XZNetworking 支持get/post/restfulGet/restfulPost请求

github地址

https://github.com/kingundertree/XZNetworking

Pod支持

pod 'XZNetworking', :git => 'https://github.com/kingundertree/XZNetworking'

Demo

https://github.com/kingundertree/XZNetworkingDemo

功能

1. 支持get请求,包括同步/异步
2. 支持post请求,包括同步/异步
3. 支持restfulGet请求,包括同步/异步
4. 支持restfulPost请求,包括同步/异步
5. 支持请求细节日志打印,包括request、header、body、response等细节信息
6. 支持系统参数传递

实现机制

1. 基于AFNetworking
2. 通过NSOperationQueen管理所有的请求

补充

1.支持AFNetworking切换其他第三方网络库,需要单独处理请求成功回调逻辑
2.可以支持加密等处理

代码片段

get请求

#pragma mark - get Request
- (void)getRequestMethodTest {
    NSDictionary *params = @{@"songIds":@"15702101"};
    NSString *method = @"data/music/links";

    [[XZRequestManager shareInstance] asyncGetWithServiceID:XZNetworkingGetServiceID methodName:method params:params target:self action:@selector(getRequestReturn:)];
}

- (void)getRequestReturn:(XZRequestResponse *)response {
    NSLog(@"response---->>%@",response.content);
}

post请求

#pragma mark - post Request
- (void)postRequestMethodTest {
    NSDictionary *params = @{@"log" : @"testtest"};
    NSString *method = @"admin.writeCrashLog";

    [[XZRequestManager shareInstance] asyncPostWithServiceID:XZNetworkingPostServiceID methodName:method params:params target:self action:@selector(postRequestReturn:)];
}

- (void)postRequestReturn:(XZRequestResponse *)response {
    NSLog(@"response---->>%@",response.content);
}

restfulGet请求

#pragma mark - restfulGet Request
- (void)restfulGetMethodTest {
    NSDictionary *params = @{@"cityId":@"41"};
    NSString *method = @"anjuke/prop/getconfig/";

    [[XZRequestManager shareInstance] asyncRESTGetWithServiceID:XZNetworkingRestfulGetServiceID methodName:method params:params target:self action:@selector(restfulGetRequestReturn:)];
}

- (void)restfulGetRequestReturn:(XZRequestResponse *)response {
    NSLog(@"response---->>%@",response.content);
}

restfulPost

#pragma mark - restfulPost Request
- (void)restfulPostRequestMethodTest {
    NSDictionary *params = @{@"brokerId":@"1512265",@"chatFlag":@"1",@"cityId":@"41",@"token":@"ac69cf3c7cd1c116f41e5686928bfef6"};
    NSString *method = @"broker/getinfoandppc/";

    [[XZRequestManager shareInstance] asyncRESTPostWithServiceID:XZNetworkingRestfulPostServiceID methodName:method params:params target:self action:@selector(restfulPostRequestReturn:)];
}

- (void)restfulPostRequestReturn:(XZRequestResponse *)response {
    NSLog(@"response---->>%@",response.content);
}

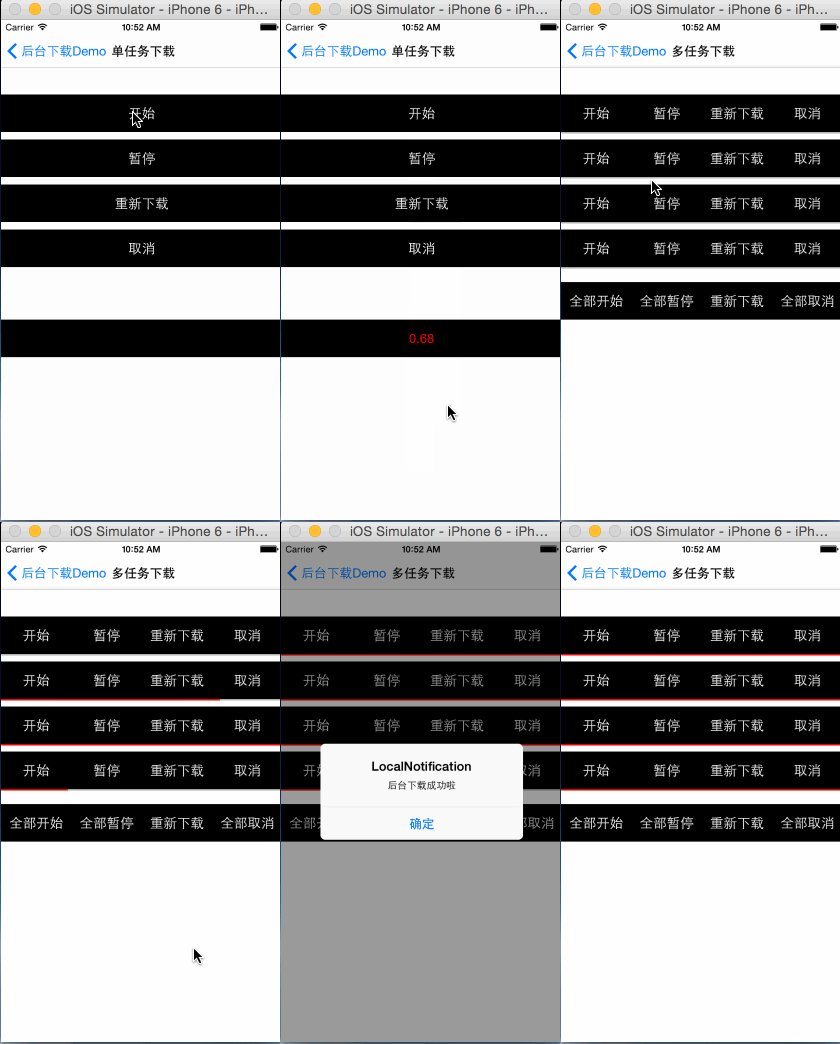
多任务下载(支持后台下载)

先上效果图

XZDownloadTask

github地址

https://github.com/kingundertree/XZDownloadTask

说明

之前坐过几版下载的demo,要么不支持多任务、要么不支持后台下载或者对设计不满意。

这次重新设计新的模块,支持单任务、多任务、后台下载。

保留一个彩蛋,供下次优化。

功能

  1. 支持单个任务下载,实现下载、暂停、重新下载、取消等。
  2. 单个任务支持后台下载,下载内容存储和下载信息回调,包括下载存储url和下载进度
  3. 支持多任务下载,包括批量下载、批量暂停、批量取消、批量重启。支持单个任务设置是否后台下载。同样支持单个任务的进度等信息回调。

实现机制

  1. 下载基于iOS7 NSURLSessionDownloadTask 实现,通过配置NSUrlSession实现
  2. 通过NSURLSession配置backgroundSessionConfigurationWithIdentifier,实现后台下载
  3. 通过NSURLSession配置defaultSessionConfiguration,实现普通下载
  4. 通过NSURLSessionDownloadDelegate的代理方法,获取下载进度进度、下载成功失败以及后台下载完成信息

设计模式

XZDownloadTask.........................下载类
    XZDownloadManager..................下载主功能实现区
    XZDownloadGroupManager.............多人下载管理类
    XZDownloadElement..................每个下载任务的辅助类
    XZDownloadResponse.................下载成功失败进度的响应类

单任务下载实现

1.创建下载任务
通过isDownloadBackground分别创建常规下载任务或后台下载任务。

- (void)configDownloadInfo:(NSString *) downloadStr isDownloadBackground:(BOOL)isDownloadBackground identifier:(NSString *)identifier succuss:(void (^)(XZDownloadResponse *response)) succuss fail:(void(^)(XZDownloadResponse *response)) fail progress:(void(^)(XZDownloadResponse *response)) progress cancle:(void(^)(XZDownloadResponse *response)) cancle pause:(void(^)(XZDownloadResponse *response)) pause resume:(void(^)(XZDownloadResponse *response)) resume{
    self.downloadSuccuss = succuss;
    self.downloadFail = fail;
    self.downloadProgress = progress;
    self.downloadCancle = cancle;
    self.downloadPause = pause;
    self.downloadResume = resume;

    self.identifier = identifier ? identifier : [[NSProcessInfo processInfo] globallyUniqueString];

    if (isDownloadBackground) {
        [self startBackgroundDownload:downloadStr identifier:self.identifier];
    } else {
        [self startNormalDownload:downloadStr];
    }
}

2.常规下载任务

- (void)startNormalDownload:(NSString *)downloadStr {
    NSURLRequest *request = [NSURLRequest requestWithURL:[NSURL URLWithString:downloadStr]];
    self.normalSessionTask = [self.normalSession downloadTaskWithRequest:request];
    [self.normalSessionTask resume];
}

- (NSURLSession *)normalSession {
    if (!_normalSession) {
        NSURLSessionConfiguration *sessionConfig = [NSURLSessionConfiguration defaultSessionConfiguration];
        _normalSession = [NSURLSession sessionWithConfiguration:sessionConfig delegate:self delegateQueue:nil];
        _normalSession.sessionDescription = @"normal NSURLSession";
    }

    return _normalSession;
}

3.后台下载任务

- (void)startBackgroundDownload:(NSString *)downloadStr identifier:(NSString *)identifier {
    NSURLRequest *request = [NSURLRequest requestWithURL:[NSURL URLWithString:downloadStr]];
    self.backgroundSession = [self getBackgroundSession:identifier];
    self.backgroundSessionTask = [self.backgroundSession downloadTaskWithRequest:request];
    [self.backgroundSessionTask resume];
}

- (NSURLSession *)getBackgroundSession:(NSString *)identifier {
    NSURLSession *backgroundSession = nil;
    NSURLSessionConfiguration *config = [NSURLSessionConfiguration backgroundSessionConfigurationWithIdentifier:[NSString stringWithFormat:@"background-NSURLSession-%@",identifier]];
    config.HTTPMaximumConnectionsPerHost = 5;
    backgroundSession = [NSURLSession sessionWithConfiguration:config delegate:self delegateQueue:nil];

    return backgroundSession;
}

4.暂停下载任务

核心方法cancelByProducingResumeData

- (void)pauseDownload {
    __weak typeof(self) this = self;
    if (self.normalSessionTask) {
        [self.normalSessionTask cancelByProducingResumeData:^(NSData *resumeData) {
            this.partialData = resumeData;
            this.normalSessionTask = nil;
        }];
    } else if (self.backgroundSessionTask) {
        [self.backgroundSessionTask cancelByProducingResumeData:^(NSData *resumeData) {
            this.partialData = resumeData;
        }];
    }
}

4.重启下载任务

核心方法downloadTaskWithResumeData

- (void)resumeDownload {
    if (!self.resumeSessionTask) {
        if (self.partialData) {
            self.resumeSessionTask = [self.normalSession downloadTaskWithResumeData:self.partialData];

            [self.resumeSessionTask resume];
        }
    }
}    

5.取消下载任务

核心方法cancel

- (void)cancleDownload {
    if (self.normalSessionTask) {
        [self.normalSessionTask cancel];
        self.normalSessionTask = nil;
    } else if (self.resumeSessionTask) {
        self.partialData = nil;
        [self.resumeSessionTask cancel];
        self.resumeSessionTask = nil;
    } else if (self.backgroundSessionTask) {
        [self.backgroundSessionTask cancel];
        self.backgroundSessionTask = nil;
    }    
}            

6.后台下载成功后回调

- (void)application:(UIApplication *)application handleEventsForBackgroundURLSession:(NSString *)identifier completionHandler:(void (^)())completionHandler
{
    self.backgroundURLSessionCompletionHandler = completionHandler;
}

7.后台下载成功后回调

- (void)application:(UIApplication *)application handleEventsForBackgroundURLSession:(NSString *)identifier completionHandler:(void (^)())completionHandler
{
    self.backgroundURLSessionCompletionHandler = completionHandler;
}

8.后台下载成功后回调NSURLSessionDownloadDelegate

下载中,处理下载进度

- (void)URLSession:(NSURLSession *)session downloadTask:(NSURLSessionDownloadTask *)downloadTask didWriteData:(int64_t)bytesWritten totalBytesWritten:(int64_t)totalBytesWritten totalBytesExpectedToWrite:(int64_t)totalBytesExpectedToWrite
{
    double currentProgress = totalBytesWritten / (double)totalBytesExpectedToWrite;
    NSLog(@"%@---%0.2f",self.identifier,currentProgress);
}

下载失败

- (void)URLSession:(NSURLSession *)session downloadTask:(NSURLSessionDownloadTask *)downloadTask didResumeAtOffset:(int64_t)fileOffset expectedTotalBytes:(int64_t)expectedTotalBytes
{
    // 下载失败
}

下载成功

- (void)URLSession:(NSURLSession *)session downloadTask:(NSURLSessionDownloadTask *)downloadTask didFinishDownloadingToURL:(NSURL *)location
{
    // 下载成功后文件处理
    NSFileManager *fileManager = [NSFileManager defaultManager];

    NSArray *URLs = [fileManager URLsForDirectory:NSDocumentDirectory inDomains:NSUserDomainMask];
    NSURL *documentsDirectory = URLs[0];

    NSURL *destinationPath = [documentsDirectory URLByAppendingPathComponent:self.identifier];
    NSError *error;

    [fileManager removeItemAtURL:destinationPath error:NULL];
    BOOL success = [fileManager copyItemAtURL:location toURL:destinationPath error:&error];

    if (success) {
        dispatch_async(dispatch_get_main_queue(), ^{
            // 此处可更新UI
        });
    } else {
    }

    // 下载成功后,下载任务处理,包括后台任务和普通任务区别,以及重启任务        
    if(downloadTask == self.normalSessionTask) {
        self.normalSessionTask = nil;
    } else if (downloadTask == self.resumeSessionTask) {
        self.resumeSessionTask = nil;
        self.partialData = nil;
    } else if (session == self.backgroundSession) {
        self.backgroundSessionTask = nil;

        AppDelegate *appDelegate = (AppDelegate *)[[UIApplication sharedApplication] delegate];
        if(appDelegate.backgroundURLSessionCompletionHandler) {
            void (^handler)() = appDelegate.backgroundURLSessionCompletionHandler;
            appDelegate.backgroundURLSessionCompletionHandler = nil;
            handler();

            NSLog(@"后台下载完成");
        }            
    }
}

9.后台下载完成,本地通知

- (void)showLocalNotification:(BOOL)downloadSuc {
    UILocalNotification *notification = [[UILocalNotification alloc] init];
    if (notification!=nil) {

        NSDate *now=[NSDate new];
        notification.fireDate=[now dateByAddingTimeInterval:6]; 
        notification.repeatInterval = 0; 

        notification.timeZone = [NSTimeZone defaultTimeZone];
        notification.soundName = UILocalNotificationDefaultSoundName;
        notification.alertBody = downloadSuc ? @"后台下载成功啦" : @"下载失败";
        notification.alertAction = @"打开";  
        notification.hasAction = YES;
        notification.applicationIconBadgeNumber =+ 1; 

        NSDictionary* infoDic = [NSDictionary dictionaryWithObject:@"value" forKey:@"key"];
        notification.userInfo = infoDic;
        [[UIApplication sharedApplication] scheduleLocalNotification:notification];
    }
}    

多任务下载

多任务下载,基于单独任务下载实现。只是提供了统一的方法进行管理。

多任务下载采用单例管理

1.调用多任务下载,需要手动传入下载请求

需要手动添加identifier,并通过identifier作为唯一标识,处理后续下载任务。

NSString *identifier = [[NSProcessInfo processInfo] globallyUniqueString];

[[XZDownloadGroupManager shareInstance] addDownloadRequest:[musicUrlArr objectAtIndex:index] identifier:identifier targetSelf:self showProgress:YES isDownloadBackground:YES downloadResponse:^(XZDownloadResponse *response) {
    [this handleResponse:response];
}];

2.下载任务处理

这是下载模块处理最频繁的方法

- (void)handleResponse:(XZDownloadResponse *)response {
    if (response.downloadStatus == XZDownloading) {
        NSLog(@"下载任务ing%@",response.identifier);
        XZDownloadView *downloadView = [self getDownloadView:response.identifier];
        dispatch_async(dispatch_get_main_queue(), ^{
            downloadView.progressV = response.progress;
        });
    } else if (response.downloadStatus == XZDownloadSuccuss) {
        NSLog(@"下载任务成功%@",response.identifier);
        XZDownloadView *downloadView = [self getDownloadView:response.identifier];
        downloadView.progressV = 1.0;
    } else if (response.downloadStatus == XZDownloadBackgroudSuccuss) {
        NSLog(@"后台下载任务成功%@",response.identifier);
        [self showLocalNotification:YES];
        XZDownloadView *downloadView = [self getDownloadView:response.identifier];
        downloadView.progressV = 1.0;
    } else if (response.downloadStatus == XZDownloadFail) {
        NSLog(@"下载任务失败%@",response.identifier);
        [self showLocalNotification:NO];
    } else if (response.downloadStatus == XZDownloadCancle) {
        NSLog(@"下载任务取消%@",response.identifier);
    } else if (response.downloadStatus == XZDownloadPause) {
        NSLog(@"下载任务暂停%@",response.identifier);
    } else if (response.downloadStatus == XZDownloadResume) {
        NSLog(@"下载任务重启%@",response.identifier);
    }
}

3.多任务的暂停、重启、取消

暂停

[[XZDownloadGroupManager shareInstance] pauseAllDownloadRequest];

重启

[[XZDownloadGroupManager shareInstance] resumeAllDownloadRequest];

取消

[[XZDownloadGroupManager shareInstance] cancleAllDownloadRequest];

XZMusic构架设计

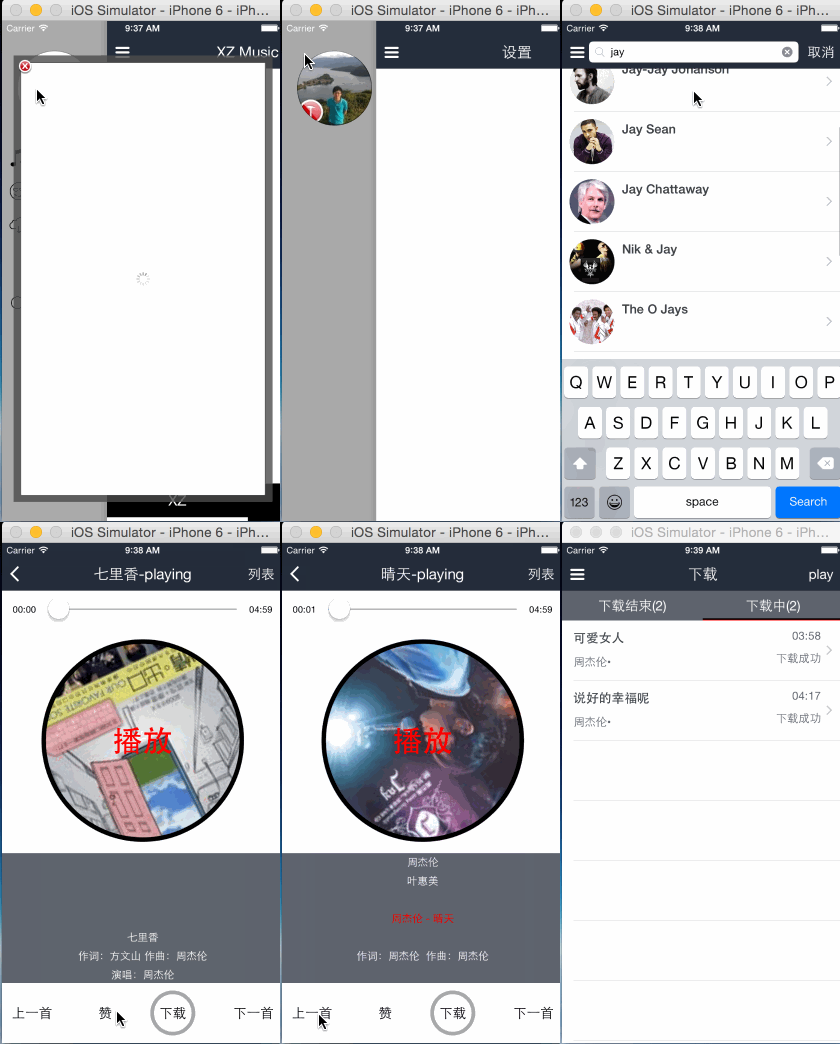
先上效果图

XZMusic

github地址

https://github.com/kingundertree/XZMusic

说明

  1. 本md主要主要通过XZMusic分析下常见的iOS项目的搭建以及常见模块的设计和划分
  2. 本项目的音乐信息取自本地SQL数据,通过FMDB获取
  3. 音乐的统计信息采用CoreData实现
  4. 歌曲资源和歌词取自网络
  5. 播放器采用DOUAudio
  6. 采用pod方式管理第三方库

功能

  1. 本地搜索歌曲
  2. 歌曲播放和下载、显示歌词
  3. 歌曲的基本统计,包括点赞、播放次数等
  4. 微博登录

主要模块

  1. 网络请求模块XZNetWorking:集成AFNetworking,支持常见的get/post/restfulget/getfulget常见请求
  2. 音乐下载模块MusicDownLoad:支持歌曲、歌词下载,包括本地存储处理,已经下载进度及常见信息回调
  3. 微博登录libWeiboSDK:配合LoginManager使用
  4. UI主结构XZMenu:实现左右结构,滑动显示菜单
  5. UITabBar结构XZTabBar

构架设计

XZMusic
    Data..........................本地化数据处理,包括本地音乐信息及音乐统计停息
        XZMusicDataCenter.........coredata表信息输入输出接口
        LKDBCenter................SQL表信息输入输出接口
        Model.....................本地数据库数据模型
    Libs..........................不支持pod的库
        DOUAudio..................音乐播放,支持在线播放
        XZNetWorking..............网络请求库,集成AFNetworking库
        libWeiboSDK...............微博登录SDK
    Manager.......................APP业务操作管理类
        GlobalManager.............app全局性参数管理,比如当前播放musicId、列表信息,以及下载的实时信息
        MusicDownLoad.............下载功能模块,支持音乐和歌词下载,本地存储处理,已经下载进度及常见信息回调
        RequestManager............网络请求的请求
        LoginManager..............登录操作管理
    Model.........................app常见业务的model
    Resource......................常见资源,包括图片等
    Views.........................视图资源,也就是app最重要的模块
        component.................通用的view类,包括base VC、table、Category、手势控件等
        DownLoad..................下载VC
        Login.....................登录VC
        Loving....................最爱VC
        Search....................搜索VC
        Setting...................设置VC
        ViewController............子页面VC
        XZMenu....................app主view结构
        XZTabBar..................UITabbar自定义结构
    XZAppDelegate.h
    XZAppDelegate.m

Pods..............................支持第三方的类库

    platform :ios, "6.0"
    pod 'AFNetworking', '~> 2.0'
    pod 'pop', '~> 1.0'
    pod 'FMDB'
    pod 'LKDBHelper', :head
    pod 'MBProgressHUD', '~> 0.8'
    pod 'MultiFunctionCell', :git => 'https://github.com/kingundertree/MultiFunctionCell'

补充

  1. 后面的文章中单独对下载模块和网络请求模块的设计做详细阐述
  2. 本项目的设计还有很多不足之处,主要体现在UI的左右结构设计和GCD使用还不够熟练

时间记录

  1. 2014.8.22 周浦万达广场麦当劳,创建项目,实现pod管理和基本配置
  2. 2014.8.28 公司,完成左右菜单结构,以及基本TabBar功能
  3. 2014.8.29 公司,结构完善,引入手势控件
  4. 2014.8.31 临港豪生,实现左侧菜单切换基本功能
  5. 2014.9.22 实现微博登录和登录后信息
  6. 2014.10.22 逐步实现asyncGetWithServiceID和的同步和异步方法,流程走通,待测试
  7. 2014.10.29 调试url参数,service阶段
  8. 2013.11.2 调试XZNetWork Get请求成功。api请求告一段落
  9. add LKDBHelper,实现歌手列表搜索,需要设计搜索模块
  10. add search singerList ViewController
  11. add search singerSongs Request
  12. 11.13 add DOUAudioPlayer 实现播放歌曲功能
  13. 11.22 实现本地音乐、歌词下载,以及本地播放功能
  14. 11.23 实现歌词播放,进度同步
  15. 12.2 add 播放暂停控制,以及其他ui
  16. 12.6 add 子view 下载功能
  17. 12.14 add 歌曲播放数据库读写记录操作

需要fix 方法

LKDBHelper.m

1
2
3
4
5
6
7
8
9
10
11
12
13
14
15
16
17
18
19
- (instancetype)init
{
return [self initWithDBName:@"FreeMusic"];
}
+(NSString*)getDBPathWithDBName:(NSString*)dbName
{
NSString* fileName = nil;
if([dbName hasSuffix:@".db"] == NO) {
fileName = [NSString stringWithFormat:@"%@.db",dbName];
}
else {
fileName = dbName;
}
// NSString* filePath = [LKDBUtils getPathForDocuments:fileName inDir:@"db"];
NSString* filePath = [LKDBUtils getPathForDocuments:fileName inDir:nil];
return filePath;
}

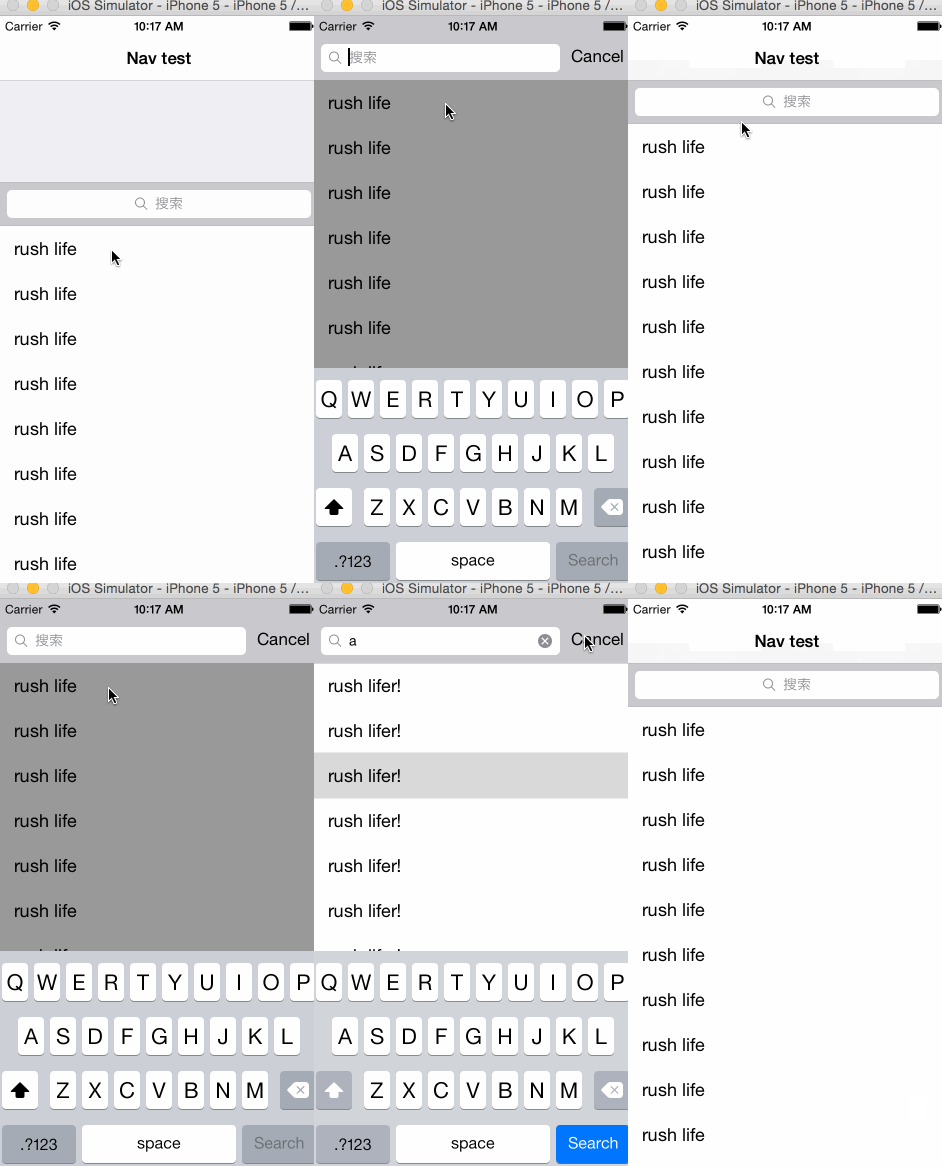
多功能UITableViewCell菜单

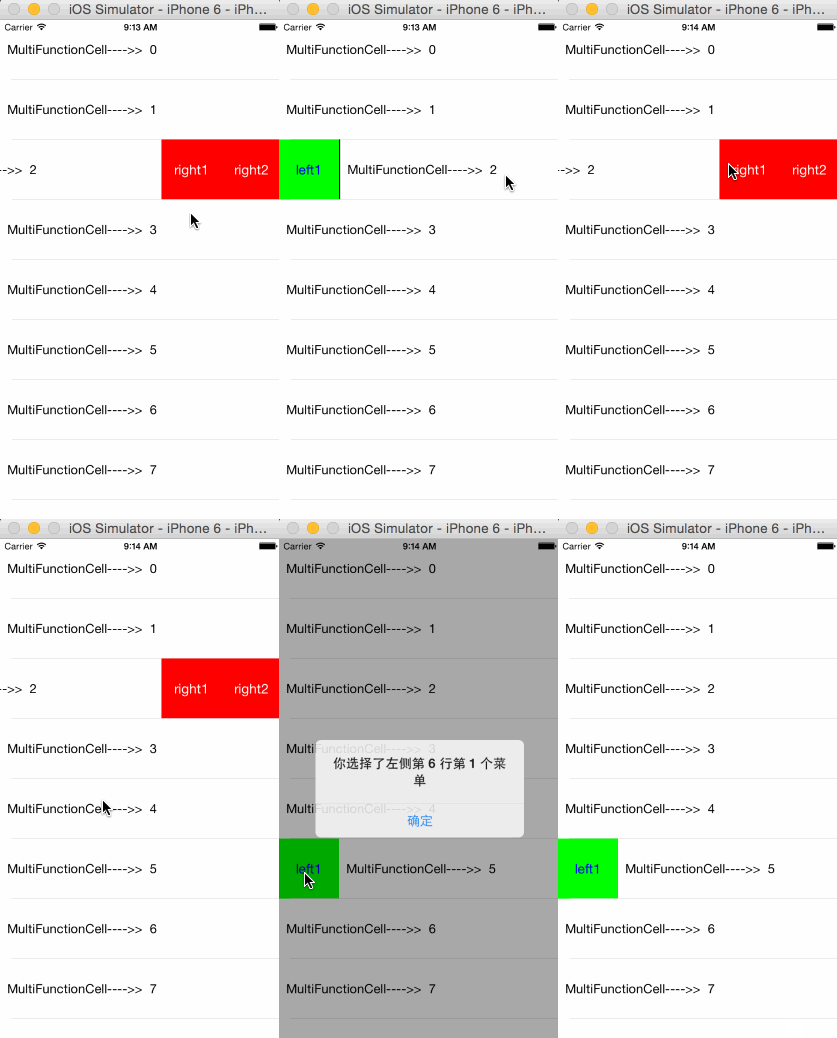
先上效果图

Mou icon

github地址

https://github.com/kingundertree/MultiFunctionCell

功能

  1. 支持定制UITableViewCell菜单,通过滑动UITableViewCell显示左右侧菜单选项
  2. 支持cell的重用,以及单个cell的菜单定制

实现机制

  1. 定制UITableViewCell,在UITableViewCell.contentView上添加UIScrollView作为主视图,并绑定UIPanGestureRecognizer手势
  2. 定义左右菜单视图,置于UIScrollView之下
  3. 通过UIPanGestureRecognizer的事件控制UIScrollView的frame实现菜单的显示和隐藏
  4. 定制UITableView,通过OverLayViewDelegate控制罩层的显示和隐藏

使用方法

UITableView

继承MultiFunctionTableView

self.tableList = [[MultiFunctionTableView alloc] initWithFrame:self.view.bounds style:UITableViewStylePlain];
self.tableList.delegate = self;
self.tableList.dataSource = self;
self.tableList.rowHeight = 80;
[self.view addSubview:self.tableList];

Datasource的cellForRow方法中实现
HomeViewCell继承MultiFunctionCell即可,并设置cell.cellActionDelegate = self.tableList即可。其他都不用care了

- (UITableViewCell *)tableView:(UITableView *)tableView cellForRowAtIndexPath:(NSIndexPath *)indexPath{
    static NSString *cellIdentify = @"cell";
    HomeViewCell *cell = [tableView dequeueReusableCellWithIdentifier:cellIdentify];
    if (!cell) {
        cell = [[HomeViewCell alloc] initWithStyle:UITableViewCellStyleDefault
                                   reuseIdentifier:cellIdentify
                               containingTableView:tableView
                                leftUtilityButtons:@[@"left1"]
                               rightUtilityButtons:@[@"right1",@"right2"]];
        cell.cellActionDelegate = self.tableList;
        [cell configCell:nil index:indexPath];
    }


    return cell;
}

XXMenuDemo,三栏式滑动菜单结构

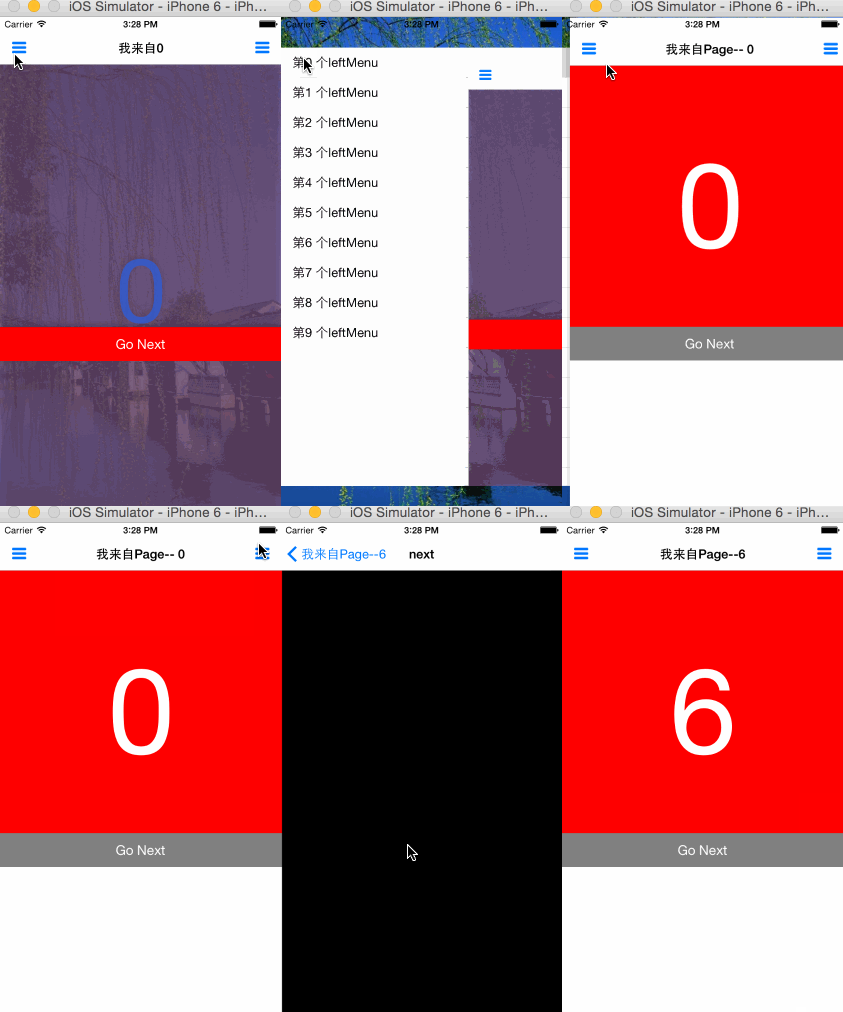
先上效果图

Mou icon

github地址

https://github.com/kingundertree/XXMenuDemo

说明

左右滑动,显示左侧菜单。这种交互在2014年比较火,我最喜欢的实现效果是华住app。不过后台他也改成tab结构。

这个Demo实在左侧菜单的基础上,增加为支持左右侧菜单。并且支持主视图缩放效果。

后面还附上swift版本github项目。

主要基于手势控制,以及缩放动画实现。再以及工程的设计思路。

并且添加的手势滑动返回功能,见:http://kingundertree.github.io/2015/04/24/手势滑动返回/

功能

  1. 支持右滑,显示左侧菜单
  2. 支持左滑,显示右侧菜单
  3. 支持左右侧菜单滑动切换
  4. 支持手势滑动返回
  5. 支持滑动时,主视图平滑缩放效果

实现机制

  1. XXMenuVC基于viewController,add initWithRootViewController生成的PushBackNavigationController视图
  2. 赋予XXMenuVC给 self.window.rootViewController
  3. 在XXMenuVC add 左右菜单视图,并添加UITapGestureRecognizer、UIPanGestureRecognizer手势控制。
  4. XXMenuVC视图的移动控制KVO实现
  5. 基于手势控制调整主视图的frame和缩放。
  6. 通过XXMenuVC控制视图切换和左右菜单的交互

使用方法

目前,所有功能都已经集成到XXMenuViewController中,需要定制XXLeftMenuView、XXRightMenuView。

1.初始化

在AppDelegate中add主视图XXMenuVC,并设置XXMenuVC为变量

XXMainViewController *mainVC = [[XXMainViewController alloc] init];
PushBackNavigationController *nav = [[PushBackNavigationController alloc] initWithRootViewController:mainVC];
if (SYSTEM_VERSION_LESS_THAN(@"7.0")) {
    [[UIApplication sharedApplication] setStatusBarHidden:TRUE];
}
XXMenuVC = [[XXMenuViewController alloc] initWithRootVC:nav];
if (SYSTEM_VERSION_LESS_THAN(@"7.0")) {
    [[UIApplication sharedApplication] setStatusBarHidden:NO];
}

self.window.rootViewController = XXMenuVC;

2.设置左右菜单view

 leftMenuView = [[XXLeftMenuView alloc] initWithFrame:frame];
 rightMenuView = [[XXRightMenuView alloc] initWithFrame:frame];

3.显示隐藏左右菜单

- (void)showMenu:(BOOL)isLeftMenu;

4.设置初始化主视图

- (id)initWithRootVC:(UIViewController *)controller

5.左右菜单的操作事件,替换主视图

- (void)replaceRootVC:(UIViewController *)replaceVC isFromLeft:

6.XXMenuVC

主视图的所有交互通过XXMenuVC实现

[XXAppDelegate sharedAppDelegate].XXMenuVC

swift版本

github地址

xcode6.3 编译正常通过

只实现主要功能,包括手势控制和左右菜单显示和隐藏

https://github.com/kingundertree/XXMenuBySwiftDemo

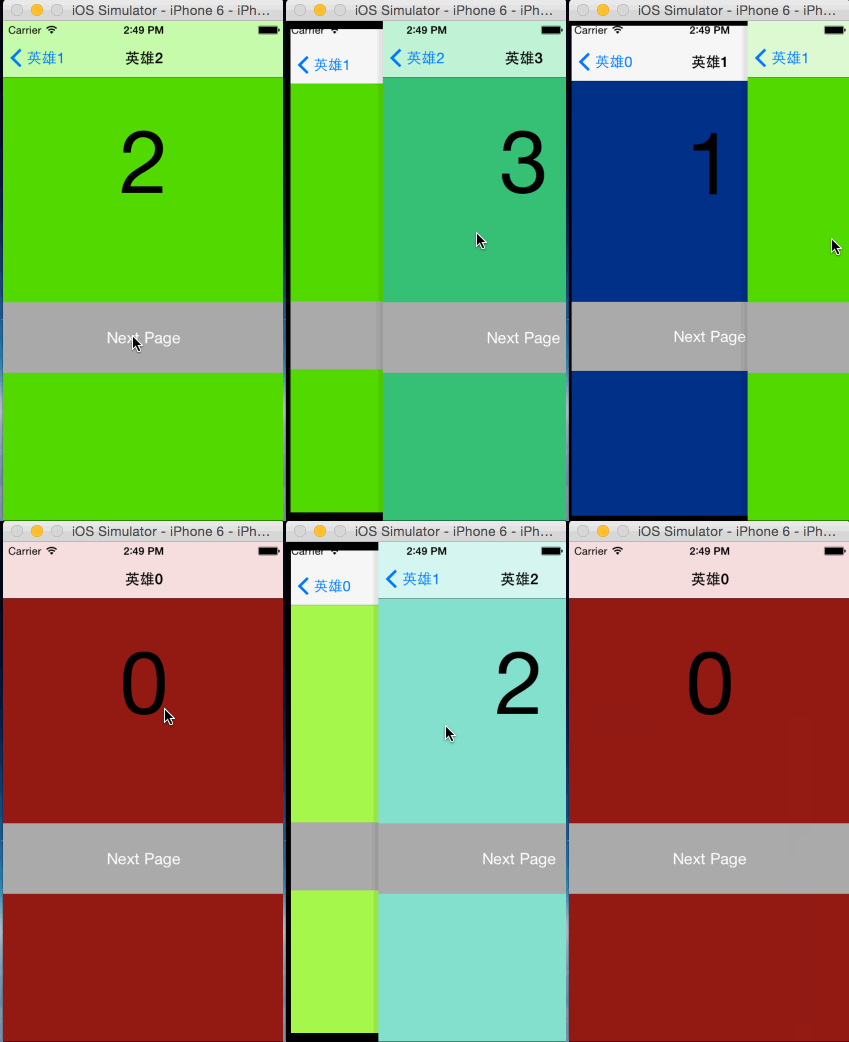
手势滑动返回,多种实现方案

OC实现手势滑动控制viewCotroller 返回功能

先上效果图

Mou icon

github地址

https://github.com/kingundertree/pushBackDemo

主要功能

  1. 支持iOS5~8,滑动viewController,实现页面返回
  2. 支持背景缩放和视差平滑2种模式
  3. 支持单个页面和多个页面pop,支持页面返回后通知
  4. 单个viewController禁用手势

设计思路

  1. 继承UINavgationController,继承pushViewController方法。push的时候,依次调用[self capture],截取上一个viewController并保存
  2. UINavgationController的view上add GestureRecognizer,监听手势动作
  3. 手指右滑开始,将最新截图insertSubview: belowSubview:到当前view,并通过滑动距离,控制belowSubview的效果
  4. popViewControllerAnimated或者popToViewController: animated:后,移除对应的截图

使用方法

1.继承PushBackNavgationController

PushBackNavigationController *nav = [[PushBackNavigationController alloc] initWithRootViewController:MVC];
self.window.rootViewController = nav;

2.设置手势滑动效果,支持背景缩放和平滑

typedef enum {
    CaptureTypeWithView = 0,
    CaptureTypeWithWindow
}CaptureType; //截图区域选择

3.禁用某个页面手势

在需要控制的viewController,引入pushBackLock
[pushBackLock setDisableGestureForBack:self.navgationgationController disable:YES]
如果禁用所有手势,则不继承PushBackNavgationController即可

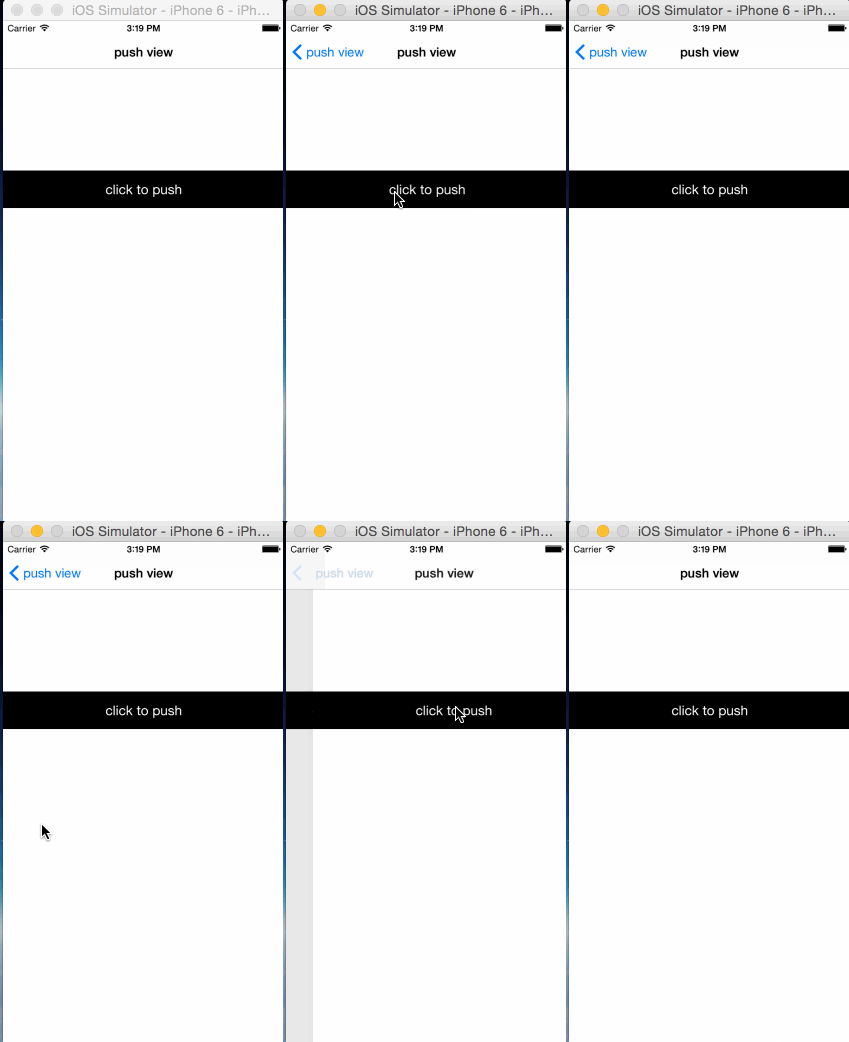
拦截iOS7 滑动返回手势

效果图

见iOS7 系统自带原生手势滑动返回,但是控制区域在左侧10px位置,本demo支持viewController全部区域
Mou icon

github地址

https://github.com/kingundertree/ExtensionNavGesForiOS7

主要功能

  1. 模拟iOS手势滑动返回效果
  2. 只支持iOS7 及以上版本
  3. 此方法比较简单,而且系统提供的手势滑动效果更加细腻。但是采用NSRunloop截取系统事件,使用需谨慎。

实现思路

  1. iOS7 开始,系统提供手势滑动返回功能,但是操作区域有限
  2. 设法截取系统手势事件,UINavgationController的interactivePopGestureRecognizer
  3. 自定义UIPanGestureRecognizer并add到UINavgationController的view上
  4. 截取interactivePopGestureRecognizer的target和action
  5. 把interactivePopGestureRecognizer的target和action,赋给自定义的手势上即可

使用方法

  1. 继承ExtensionNav即可

效果图

见iOS7 系统自带原生手势滑动返回,但是控制区域在左侧10px位置,本demo支持viewController全部区域
Mou icon

github地址

https://github.com/kingundertree/TransitionPopForiOS7-

主要功能

  1. 模拟iOS手势滑动返回效果
  2. 只支持iOS7 及以上版本

实现思路

  1. 设法截取系统手势事件,UINavgationController的interactivePopGestureRecognizer
  2. 通过ISO7提供的转场动画事件NavigationInteractiveTransition,创建新的action
  3. 在action中计算progress,分别实现updateInteractiveTransition、finishInteractiveTransition、cancelInteractiveTransition事件即可

使用方法

  1. 继承ExtensionNav即可

swift 语言实现手势滑动返回效果

github地址

效果同上,采用swift语言重新实现。

https://github.com/kingundertree/PushBackBySwiftDemo

UITableView 重用机制

最近在看这个瀑布流的项目:https://github.com/pingyourid/waterView

他自称是可以重用的,看到最后发现,这个demo的瀑布流功能做的蛮深入的。

他通过设置reuseIdentifier,视图滚动时进进出出实现视图的重复利用。区别于UITableView的UITableViewCell的重用机制,瀑布流Demo完全实现了手动控制。

UITableView虽然用了无数次,但是一直没有自习整理过他的重用机制。今天统一整理下,也方便日后实现自定义的重复功能。

重用

  1. 重用机制,主要用在UIScollView视图中,子视图会频繁上下滑动,但是自子视图的结构非常类似。通过重用,避免大量的内存开销。尤其是在iphone 单核时代。
  2. UITableView在cellForRow方法中dequeueReusableCellWithIdentifier设置重用标记。
  3. 当面屏幕中所显示的子视图都是真实存在,相互之间不重用。但是当前子视图可以重用已经init但是已经移除视图外的子视图。

实现机制

假如当前屏幕UITableView 可以最多显示6个cell,用3种不同的cell,也就是需要设置3个不同的identifier。

  1. cellForRow最多生成可以占满屏幕的cell,也就是6个。这个时候,所有的cell都不会加入到reuse cell queue。也就是生成了2组不同identifier的cell,共6个。
  2. 向上滑动,生成第7个cell。
  3. 继续滑动,第1个cell隐藏时,此cell加入reuse cell queue。
  4. 向上滑动,生成第8个cell。
  5. 继续滑动,第2个cell隐藏时,此cell加入reuse cell queue。
  6. 向上滑动,生成第9个cell。
  7. 继续滑动,第3个cell隐藏时,此cell加入reuse cell queue。
  8. 向上滑动,生成第10个cell。
  9. 此时dequeueReusableCellWithIdentifier可以从reuse cell queue获取到reuse cell,就不在创建新的cell,直接返回,重新配置数据即可,并把此cell从队列去移除。
  10. 到第12个cell,都是此逻辑。然后每3个cell以此往复。

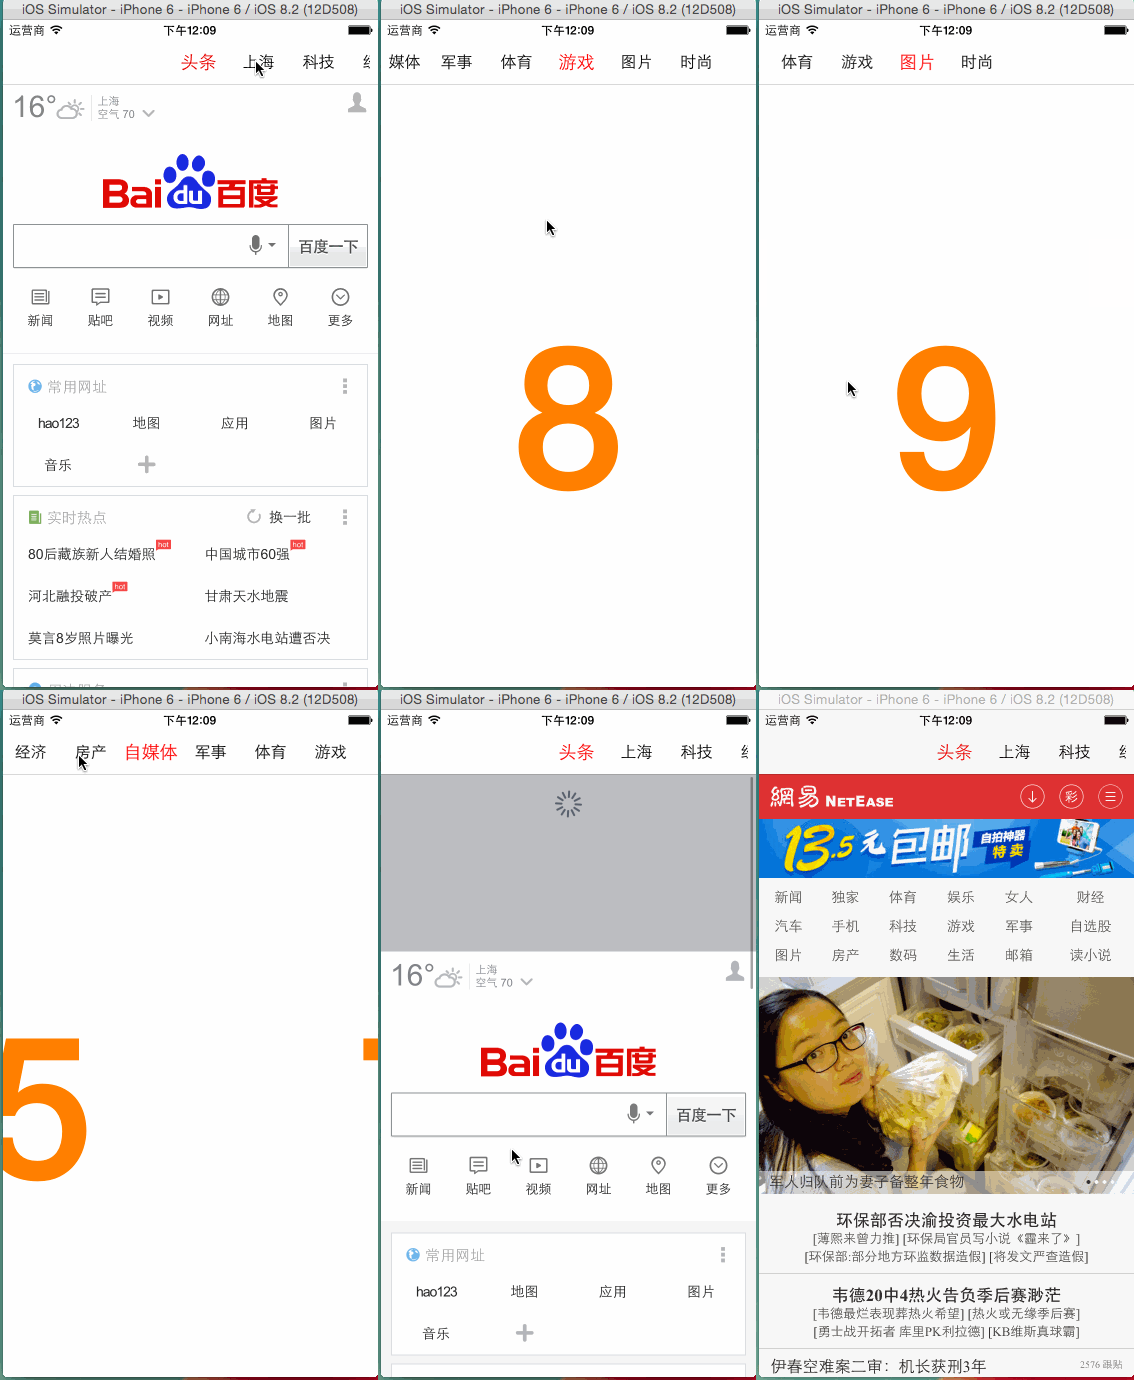
XZPageViewController 类似搜狐新闻切换效果

先上效果图

Mou icon

github地址

https://github.com/kingundertree/XZPageViewController

说明

见过一些类似的设计,但是很多都是采用UIScrollView,add viewController,然后自己监控UIScrollView的变化值实现导航和viewController的通讯,甚至有采用UITableView横过来的方式实现,深不以为然。一方面是实现成本大,操作麻烦,再就是viewController的生命周期需要单独控制等。

更推崇系统提供的UIPageViewController方法,这个方法本来是方便实现类似读书软件的翻页效果。

功能

  1. 支持左右滑动快速切换viewController
  2. 支持viewController和导航的相互控制
  3. 支持viewController的切换效果和循环滚动

实现机制

  1. 基于UIPageViewController以及其UIPageViewControllerDataSource,UIPageViewControllerDelegate
  2. 通过UIPageViewControllerDataSource 为 UIPageViewController 添加 viewControllerBeforeViewController 或 viewControllerAfterViewController ,实现视图的切换
  3. 通过UIPageViewControllerDelegate,通知实现导航效果切换
  4. 通过setViewControllers,实现点击导航切换viewcontrollers

使用方法

目前,所有功能都已经集成到XZPageViewController中,只继承XZPageViewController,然后实现XZPageViewControllerDataSource,XZPageViewControllerDelegate。

XZPageViewControllerDataSource

1.设置导航数量

- (float)numOfPages;

2.设置导航宽度

- (float)witdhOfNav;

3.导航标题

- (NSString *)titleOfNavAtIndex:(NSInteger)index;

4.设置viewController

- (UIViewController *)viewPageController:(XZPageViewController *)pageViewController contentViewControllerForNavAtIndex:(NSInteger)index;

5.是否循环

- (BOOL)canPageViewControllerRecycle;

6.导航切换,viewcontroller是否动画展示

- (BOOL)canPageViewControllerAnimation;
XZPageViewControllerDelegate

1.viewController切换成功事件

-(UIViewController *)viewPageController:(XZPageViewController *)pageViewController pageViewControllerChangedAtIndex:(NSInteger)index;

swift初感

swift中文版,基本看完了。整体感觉:1,语法的改动只是方便了书写,核心优势还是在于函数方法的扩增;2,iOS开发也开始变得更加复杂,可选择性也更多;3,持续性学习的要求更加多,iOS开发就可以派生出n多的分支,业务类、运动健康、支付类等等;4,我感觉,我还不是一个真正意义的程序员!

去年刚开始从oc转前端的时候,还是非ARC,因为看到很多人推荐学习,说是需要通过学习非ARC了解oc的运行机制。但是当时ARC已经推出来快2年了,我比较怀疑以上观点。后来顺利切换到ARC,极少情况下需要处理内存泄露和加持的问题。

现在iOS的语言也越来越牛逼,他帮我们考虑了更多底层处理问题,极力让程序员关注开发,关注设计和实现。非ARC的问题,估计还是有很多人纠结,就像很多人问,我学习计算机是不是一定要学习c语言。我坚持认为,这些接近底层的东西,如果不是要深入钻研,了解就够了。

毕竟,大部分工作还是在业务实现层次的。把握住技术发展,及时更上才是王道。比如swift,好多人还是觉得无所谓,有oc就好,切换到swift还需要几年。我倒觉得,一切都会很快的。因为swift才是iOS真正的高级开发语言,未来更多牛逼的应用是基于swift而不是OC。